Views: 106 Author: Site Editor Publish Time: 2025-11-08 Origin: Site


Content Menu
● The Role of Secondary Operations in CNC Workflows
● Trimming Operations: Removing Excess Stock
● Deburring Methods and Scope Control
● Planning Tools and Data-Driven Scope
● Cost Analysis for Scope Decisions
● Future Directions in Secondary Planning
Manufacturing engineers know the CNC cycle does not end when the last primary tool retracts. Parts leave the machine with sharp edges, hanging flash, and burrs that demand attention before assembly or inspection. Trimming removes excess material from castings, forgings, or rough stock. Deburring eliminates the raised lips and whiskers left by cutting tools. Both operations fall under secondary processing, and their scope must be defined early to control cost, time, and quality.
The need for disciplined secondary planning grows with part complexity. Aerospace brackets machined from titanium plate, aluminum die-cast engine mounts, and stainless steel medical implants all require different trimming and deburring strategies. Poor planning leads to rework loops, scrap, or field failures. Well-executed plans cut labor hours, reduce consumable costs, and raise first-pass yield.
This article covers the core principles of trimming and deburring, methods to determine their scope, and practical examples drawn from shop-floor experience and published research. The goal is to give engineers a clear framework for integrating these operations into CNC programs and process sheets.
Primary machining creates the nominal geometry. Secondary operations refine the part to meet functional requirements. Trimming targets gross excess material. Deburring addresses micro-scale defects. Together they ensure mating surfaces align, fasteners seat correctly, and fatigue life remains intact.
Scope determination starts with risk classification. Edges are grouped as critical (load-bearing or sealing), functional (clearance or cosmetic), or non-critical (internal pockets). Material behavior guides the decision: aluminum forms soft, flaky burrs; titanium produces hard, tenacious ones. Tool exit conditions—feed rate, spindle speed, and coolant delivery—set the initial burr height.
A mid-size job shop running 4140 steel gearbox housings found that primary contouring with a 1/2-inch end mill at 0.015-inch chipload left 0.3-mm exit burrs on bolt-hole exits. Manual filing took 12 minutes per part. By limiting deburring to hole exits and mating faces, an automated brush station cut the time to 90 seconds. The change came from mapping burr locations during setup and writing the scope into the process sheet.

Trimming is the first secondary step for parts that enter the CNC cell oversized. Castings carry gates and risers. Forgings include flash. Sheet-metal stampings have tabs. CNC trimming uses milling, turning, or dedicated fixtures to reach net shape.
Form trimming follows the finished contour. A 3/8-inch carbide end mill with four flutes runs at 7,500 rpm and 0.020-inch depth of cut on an aluminum die-cast cover. The path hugs the final profile, leaving a 0.002-inch stock allowance for finish passes. Scope is set by laser-scan data taken after casting: any protrusion above 0.8 mm triggers trimming.
Shear trimming uses a punch-like action. A vertical machining center with a fly cutter shears flash from 8620 steel forgings in one pass. The cutter runs at 9,000 rpm with 0.010-inch engagement. Scope limits the operation to linear edges longer than 50 mm; curved sections go to form trimming to avoid chatter.
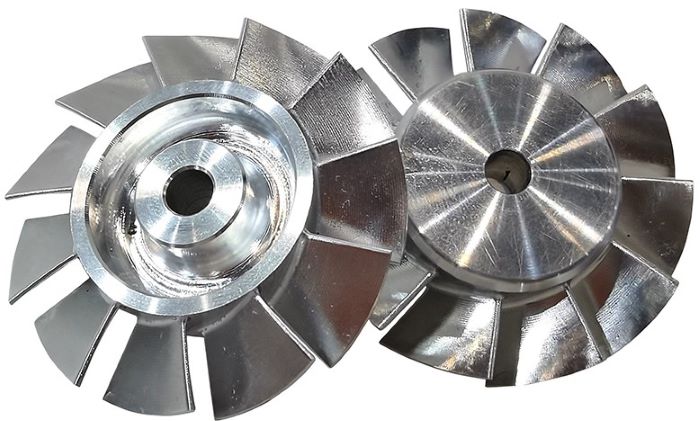
When fixture access allows, trimming merges with primary machining. A 5-axis mill roughs a titanium impeller, then swaps to a 1/4-inch ball mill to trim the root flash in the same setup. The combined cycle drops handling time from 18 minutes to 7 minutes per part.
Deburring removes raised material without altering geometry. Methods range from manual to fully automated. Scope decisions balance defect removal against over-processing.
Nylon abrasive brushes mounted in the spindle deburr hole exits. A 0.125-inch brush at 3,800 rpm and 40 ipm feed clears 0.25-mm burrs from 7075 aluminum fittings. Scope restricts brushing to threaded holes and sealing faces; cosmetic surfaces receive light tumbling.
Vibratory finishing with ceramic media handles batches. A 200-liter bowl runs for 45 minutes with compound to deburr 150 stainless steel valve bodies. Scope limits media size to 6 mm to prevent lodging in 4-mm cross holes.
Blind holes in 17-4 PH stainless hydraulic blocks receive electrochemical treatment. A 5% neutral electrolyte at 14 V dissolves burrs in 25 seconds. Scope applies only to internal intersections where mechanical tools cannot reach.
Composite battery trays with carbon-fiber edges use CO2 snow blasting. The 80-bar jet removes 0.05-mm resin flash without substrate damage. Scope targets gate remnants identified by post-mold vision systems.

Process planning begins in CAD. Edge breaks are specified as 0.1–0.3 mm radii on critical surfaces. CAM software generates toolpaths that minimize exit burrs: climb milling, reduced chipload on exits, and arc lead-outs.
Burr prediction models use chipload, rake angle, and workpiece hardness. A regression built from 120 drilling trials on Ti-6Al-4V predicts burr height within 12% accuracy. The model flags holes needing orbital deburring tools.
Fixture design influences scope. A tombstone with four faces allows trimming on two sides, deburring on the others, all in one load. Setup sheets list allowable burr height by zone: 0.05 mm max on sealing lands, 0.5 mm elsewhere.
A cost model for 500-piece runs of aluminum transmission cases compared three scopes:
Full manual deburring: 11 minutes labor, $4.40/part.
Selective brushing + tumbling: 2.8 minutes, $1.10/part.
Integrated CNC deburring bit: 1.1 minutes, $0.45/part.
The integrated approach paid back the $18,000 tool investment in four months.
A supplier for Pratt & Whitney trims Inconel 718 blades after forging. Flash thickness averages 1.2 mm. A 5-axis mill with 3/8-inch rougher removes 90% in 42 seconds, followed by a 0.2-inch finish pass. Deburring uses a flexible filament tool on vane edges. Scope limits deburring to pressure and suction sides; root fillets stay as-machined. Cycle time fell 28%, scrap dropped from 6% to 1.8%.
Ford's Kentucky plant finishes 6061 brackets. Gates are trimmed with a 1-inch fly cutter at 8,200 rpm. Vision systems flag brackets with gate height >0.6 mm for rework. Mating faces receive nylon wheel deburring; non-contact areas go to vibratory bowls. Selective scope saves 1.4 hours per 100 parts.
Hip stems in 316L require Ra <0.4 µm on bearing surfaces. Primary milling leaves 0.18-mm burrs on cross holes. Electrochemical deburring runs 18 seconds per stem. Scope confines the process to holes; external radii are hand-polished with 600-grit pads. Infection-related returns fell 4.2% after implementation.
Machine-learning models trained on spindle load and vibration data now predict burr height in real time. A pilot at Siemens reduced deburring scope by 22% on gearbox housings. Dry ice blasting gains traction for composites, eliminating media disposal.
Design for manufacturing rules embed edge breaks in CAD templates. Process planners review models at gate reviews, flagging zones that need secondary attention before release.
Secondary operations are not afterthoughts; they are engineered steps that determine part success. Trimming scope is set by measuring excess stock and mapping it to toolpaths. Deburring scope follows burr height data, material properties, and functional requirements. Examples from aerospace, automotive, and medical shops show that disciplined planning cuts labor, raises yield, and meets tight tolerances.
Engineers who master these decisions turn rough-machined blanks into flight-certified, assembly-ready components. The next program you write should include a secondary operations table: edge classification, allowable burr height, method, and cycle time. Apply the framework, measure the results, and refine the scope with each new job. The payoff is faster throughput, lower cost, and parts that assemble without surprises.

Q1: How do I measure burr height on the shop floor without lab equipment?
A: Use a 30x pocket comparator with a 0.001-inch reticle; scan exits and record the tallest whisker.
Q2: Which coolant type reduces burr formation during drilling?
A: High-pressure through-tool emulsion at 1,000 psi keeps the cutting zone clean and cools the exit.
Q3: Can I trim and deburr in the same fixture on a 3-axis mill?
A: Yes—rough trim with a large end mill, flip the part, then deburr with a brush tool in the same vise.
Q4: How does workpiece hardness affect deburring method choice?
A: Above 45 HRC, switch from nylon brushes to carbide burr tools or electrochemical to avoid rapid wear.
Q5: What CAM feature helps visualize burr-prone exits before cutting?
A: Toolpath simulation with material removal display highlights high-chipload exit zones.
What Are The Main Industries Served by Sheet Metal Fabrication?
What Are The Advantages and Applications of Aluminum Die Casting?
Work Offset Management in CNC Machining: Maintaining Accuracy Across Multiple Setup Stations
Dimensional Control in CNC Machining: Compensating for Material Spring-back After Machining